Table of Contents
ToggleRepainting kitchen cabinets can give any kitchen a dramatic facelift without the cost of replacement. But skipping or skimping on primer is where most DIY cabinet projects fall apart. The wrong primer, or no primer at all, leads to peeling paint, bleed-through stains, and a finish that looks rough within months. Choosing the right primer isn’t complicated, but it does require matching the product to the cabinet material, existing finish, and paint type. This guide walks through the best primers for kitchen cabinets in 2026, with clear recommendations, application tips, and what to avoid.
Key Takeaways
- Choosing the best primer for kitchen cabinets requires matching the product to your cabinet material, existing finish, and paint type—skipping this step leads to peeling, staining, and premature failure.
- Oil-based primers excel at blocking stains and adhering to glossy surfaces, while water-based primers offer faster drying and easier cleanup, making them ideal for previously painted cabinets in good condition.
- Thorough surface preparation—including degreasing with TSP and scuff-sanding with 120–150 grit paper—is more critical to success than the primer brand itself.
- Shellac-based primers like Zinsser B-I-N deliver unmatched stain blocking and fastest drying times (45 minutes), making them the best choice for severe stains, water marks, or problem cabinets.
- Applying two thin coats of primer beats one thick coat, and allowing full dry time before topcoating prevents weak adhesion and ensures a finish that lasts a decade or more.
Why Primer Is Essential for Kitchen Cabinet Projects
Primer does three critical jobs that topcoat alone can’t handle. First, it creates a uniform surface that allows paint to adhere properly. Wood cabinets often have uneven porosity, bare spots, grain patterns, and knots that absorb paint at different rates. Without primer, the topcoat looks blotchy and requires extra coats.
Second, primer blocks stains and tannins. Oak, cherry, and mahogany naturally leach oils that yellow or discolor lighter paint over time. Even previously painted cabinets can have grease buildup, water stains, or smoke residue that bleeds through fresh paint. A good stain-blocking primer seals those imperfections.
Third, primer improves paint durability. Kitchen cabinets take daily abuse, fingerprints, grease splatters, cleaning chemicals, and constant opening and closing. Primer creates a mechanical bond between the substrate and topcoat, reducing the risk of chipping or peeling. It’s especially important on laminate, melamine, or previously finished surfaces where paint struggles to grip.
Skipping primer might save an hour upfront, but it usually means repainting within a year or two. The small investment in a quality primer pays off in a finish that lasts a decade.
Top-Rated Primers for Kitchen Cabinets
KILZ Original Oil-Based Primer remains the workhorse for heavily stained or glossy cabinets. It blocks water stains, tannin bleed, and smoke damage better than most water-based options. The oil formula bonds aggressively to slick surfaces, making it ideal for older cabinets with multiple layers of paint or varnish. Coverage is roughly 300–400 square feet per gallon on non-porous surfaces. Dry time is 1 hour to touch, 4 hours before topcoating. Cleanup requires mineral spirits, and VOCs are high, so ventilation is mandatory.
Zinsser B-I-N Shellac-Based Primer is the go-to for severe stain blocking. Shellac seals knots, water marks, smoke, and pet odors that oil and latex primers can’t fully contain. It dries in 45 minutes and can be topcoated in under an hour, making it the fastest option for multi-coat schedules. Shellac adheres to nearly any surface without sanding, though light scuffing still improves results. It’s flammable and requires denatured alcohol for cleanup, but nothing beats it for problem cabinets.
Zinsser Bulls Eye 1-2-3 Plus is a water-based primer that balances convenience with performance. It sticks to glossy surfaces, blocks moderate stains, and dries in 30 minutes. Low odor and soap-and-water cleanup make it ideal for occupied homes. It works well on previously painted cabinets, MDF, and primed wood. For raw wood with tannins or heavy grease, an oil-based or shellac primer is safer.
Benjamin Moore Fresh Start All-Purpose Primer is another reliable water-based option. It’s slightly thicker than Bulls Eye 1-2-3, with good filling properties for minor imperfections. It’s suitable for wood, MDF, and lightly glossy surfaces. For best results on slick finishes, combine it with a thorough scuff-sanding.
All of these primers require proper surface prep. Deglosser or light sanding (120–150 grit) ensures maximum adhesion, even on “bonding” primers.
Oil-Based vs. Water-Based Primers: Which Is Right for Your Cabinets?
Oil-based primers offer superior adhesion and stain blocking. They bite into glossy finishes and seal tannins, grease, and water stains more reliably than latex. Dry times are slower, typically 4–6 hours before recoating, and VOC levels are high, requiring respirators and open windows. Cleanup demands mineral spirits. Oil primers yellow slightly over time, which isn’t an issue under darker paints but can affect white or light finishes. They’re the best choice for raw wood with knots, heavily varnished cabinets, or surfaces with grease buildup.
Water-based (latex) primers dry faster, smell less, and clean up with soap and water. Modern bonding formulas adhere to slick surfaces surprisingly well, especially after scuff-sanding. They don’t yellow and emit fewer VOCs, making them safer for occupied homes. But, they don’t block severe stains as effectively as oil or shellac. They’re ideal for previously painted cabinets in good condition, MDF, or primed wood without tannin issues.
Shellac-based primers occupy a middle ground. They block stains as well as oil, dry faster than both oil and latex, and adhere to almost anything. They’re messier to work with and require alcohol-based cleanup, but they’re unmatched for problem surfaces.
For most DIYers repainting cabinets that are already painted and in decent shape, a water-based bonding primer after scuff-sanding is sufficient. For raw wood, dark stains, or cabinets that have been cleaned with harsh degreasers, oil-based or shellac primers are safer bets. If uncertain, test a small section, prime, paint, and wait 48 hours. Try scratching the paint with a fingernail: if it peels easily, upgrade the primer.
How to Choose the Best Primer for Your Cabinet Material
Wood cabinets (oak, maple, cherry) need primers that seal tannins and fill grain. Raw or stripped wood benefits from oil-based or shellac primers. Previously painted wood can use water-based bonding primers if the surface is deglossed first. Open-grain woods like oak may need a second coat of primer or grain filler for a truly smooth finish.
MDF and engineered wood are common in modern cabinets. MDF is porous and soaks up primer unevenly. Use a water-based primer formulated for porous surfaces and expect to apply two coats. The edges of MDF are especially absorbent and may need an extra pass. Don’t over-wet MDF, it can swell if flooded with liquid.
Laminate and thermofoil cabinets are non-porous and notoriously slick. A bonding primer is essential. Zinsser Bulls Eye 1-2-3 Plus, KILZ Adhesion, or shellac-based primers all work. Surface prep is critical, clean with TSP or a degreaser, then scuff-sand with 150-grit sandpaper. Even bonding primers need tooth to grip.
Melamine is similar to laminate. Use a bonding primer and scuff-sand thoroughly. Some DIYers skip sanding by using shellac primer, which bites into smooth surfaces, but light abrasion still improves longevity.
Previously varnished or stained cabinets should be deglossed with liquid deglosser (TSP substitute) or sanded with 120–150 grit paper. Oil-based primers handle these surfaces best, but water-based bonding primers work if the gloss is fully broken.
Step-by-Step Guide to Priming Kitchen Cabinets
1. Remove doors and hardware. Label each door and hinge location with painter’s tape and a number. This prevents mix-ups during reinstallation. Remove all knobs, pulls, and hinges. Lay doors flat on sawhorses or a work table.
2. Clean thoroughly. Kitchen cabinets accumulate grease, even if they look clean. Wipe all surfaces with TSP (trisodium phosphate) or a TSP substitute. Rinse with clean water and let dry completely, at least 2 hours. Grease under primer causes adhesion failure.
3. Sand or degloss. Use 120–150 grit sandpaper to scuff glossy finishes. The goal isn’t to remove the old finish, just to dull it. A random orbital sander speeds the job, but hand sanding works for smaller kitchens. Wipe away dust with a tack cloth or damp rag. For intricate moldings, liquid deglosser is faster than sanding.
4. Fill holes and dents. Use wood filler for nail holes or gouges. Let it dry, then sand flush. Primer won’t hide deep imperfections.
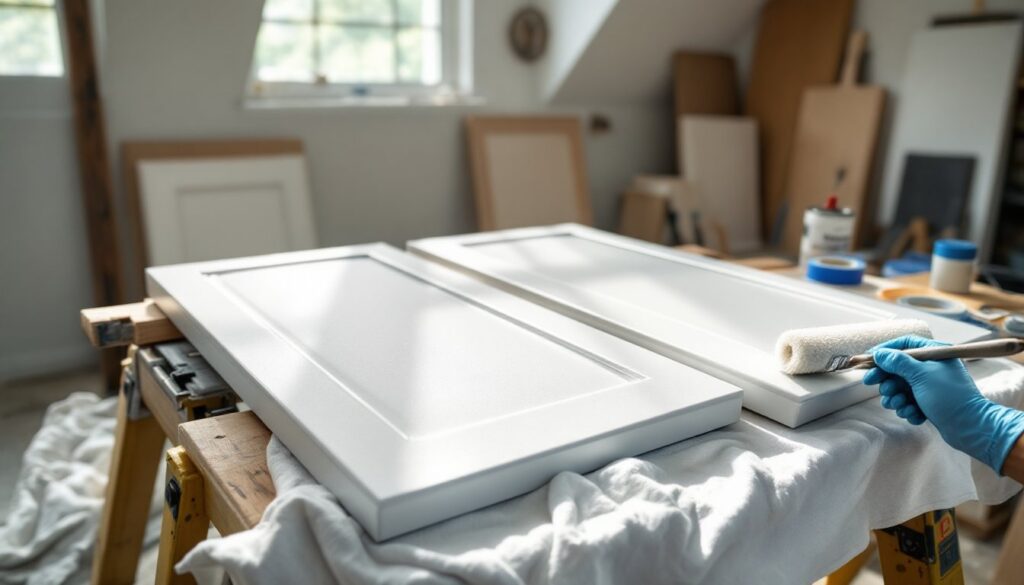
5. Apply primer. Use a foam roller for flat surfaces and a 2-inch angled brush for edges, corners, and details. Roll in one direction to minimize texture. Don’t overload the roller, thin, even coats beat thick, drippy ones. For optimal results, many pros recommend techniques used with cabinet paints to ensure smooth finishes.
6. Allow proper dry time. Check the primer label. Water-based primers often dry in 1–2 hours, but oil-based versions need 4–6 hours. High humidity slows drying. Don’t rush this step.
7. Sand between coats (if needed). Some primers dry rough. Lightly sand with 220-grit paper after the first coat dries. This step is especially important for MDF and open-grain wood. Wipe dust off before applying the second coat or topcoat.
Safety: Wear a respirator (not just a dust mask) when using oil-based or shellac primers. Latex primers need less protection, but ventilation is still important. Nitrile gloves prevent skin contact with solvents.
Common Mistakes to Avoid When Priming Cabinets
Skipping the cleaning step. Grease is invisible but deadly to paint adhesion. Even new-looking cabinets need degreasing. TSP or a strong degreaser is non-negotiable. Many kitchen remodeling resources emphasize that prep work makes or breaks a cabinet project.
Using the wrong primer for the substrate. Water-based primers fail on raw wood with tannins. Standard primers peel off laminate. Match the primer to the material and condition of the cabinets.
Applying primer too thick. Thick coats take forever to dry, sag on vertical surfaces, and create a rough texture. Two thin coats always outperform one heavy coat.
Inadequate ventilation. Oil-based and shellac primers off-gas heavily. Open windows, use fans, and wear a respirator. VOC exposure causes headaches and long-term health issues.
Not sanding between coats. Some primers dry with a slight texture, especially on porous surfaces. A quick pass with 220-grit paper smooths the surface for topcoat.
Rushing dry times. Primer that feels dry to the touch isn’t fully cured. Topcoating too soon traps solvents and weakens the bond. Follow the recoat window on the label.
Conclusion
The right primer turns a cabinet painting project from a gamble into a sure thing. Match the primer to the cabinet material, existing finish, and topcoat type. Don’t skip surface prep, cleaning and scuff-sanding matter more than brand names. For most DIYers, a quality water-based bonding primer handles previously painted cabinets. Raw wood, heavy stains, or laminate surfaces call for oil-based or shellac formulas. Take the time to prime correctly, and the finish will last a decade or more.