Table of Contents
ToggleShopping for a new vanity is the fun part, sleek cabinet, double sinks, maybe soft-close drawers. But once that box arrives, reality sets in: plumbing connections, wall anchoring, countertop leveling, and the nagging worry that one wrong move could flood your bathroom. Whether you’re upgrading a powder room or tackling a full primary bath remodel, hiring a qualified installer can mean the difference between a weekend project and a three-week disaster. This guide walks through what professional vanity installation costs in 2026, where to find vetted pros in your area, what the process looks like, and when it makes sense to call in help versus doing it yourself.
Key Takeaways
- Professional bathroom vanity installation costs range from $300–$900 for labor in 2026, with additional charges for plumbing modifications, custom countertops, and wall-mounted configurations that can add $100–$600.
- Verify that vanity installers near you are licensed, bonded, and insured with at least $500,000 in general liability coverage, and always request a written estimate that itemizes all costs including haul-away and permits.
- Typical vanity installation takes 4–6 hours for straightforward replacements but can extend to two days if plumbing relocation or custom countertop templating is required.
- Common red flags include contractors without a physical business address, requests for full upfront payment, reluctance to provide written contracts, or claims that permits aren’t necessary.
- DIY installation is feasible only for same-footprint freestanding vanities with aligned plumbing, while wall-mounted units, drain relocation, or outdated supply lines require hiring a professional to ensure code compliance and prevent costly mistakes.
- Hiring bathroom vanity installers to handle plumbing rough-in and drain work while managing cosmetic finishing yourself offers a hybrid approach that balances cost savings with professional safety standards.
Understanding Bathroom Vanity Installation Costs in Your Area
Installation pricing isn’t one-size-fits-all. A straightforward drop-in vanity swap in a metro suburb runs differently than a wall-mounted unit in a century-old rowhouse with cast-iron plumbing.
National averages in 2026 hover between $300 and $900 for labor alone, depending on complexity. That figure assumes the existing plumbing rough-in aligns with the new vanity, walls are plumb, and no surprise demolition is needed. Add another $150–$400 if the installer needs to relocate supply lines or drain stub-outs, especially if local code requires PEX or copper upgrades from old galvanized pipe.
Here’s what drives cost variation:
- Vanity type: Freestanding units are simpler: wall-hung or floating vanities require blocking installed between wall studs, often adding $100–$250 for carpentry.
- Countertop material: Pre-fabricated cultured marble or solid-surface tops drop in cleanly. Custom granite, quartz, or concrete slabs may need a separate stone fabricator and template visit, tacking on $200–$600 to the total.
- Plumbing modifications: If the new vanity shifts the sink centerline more than two inches, expect to pay for drain re-routing and possibly a permit.
- Regional labor rates: Urban markets (New York, San Francisco, Seattle) can push hourly rates to $90–$150. Rural areas often land closer to $50–$75 per hour.
- Disposal and haul-away: Removing and disposing of the old vanity typically adds $50–$100.
Always request an itemized written estimate. Vague “all-in” quotes make it tough to spot padding or identify what happens if the installer discovers rotted subfloor once the old vanity is pulled.
How to Find Qualified Vanity Installers Near You
Finding someone who shows up on time and won’t cross-thread your P-trap takes more than a quick web search. Start with a few reliable channels, then layer in your own vetting.
Online Platforms and Review Sites to Check
Three platforms consistently surface credible local tradespeople:
- Angi (formerly Angie’s List): Verified customer reviews, project cost breakdowns, and background-check badges. The service provider directory lets you filter by zip code, certification, and insurance status.
- HomeAdvisor: Pre-screened pros matched to your project scope. Their cost calculator is handy for sanity-checking estimates. Browse local bathroom professionals to compare credentials.
- ImproveNet: Aggregates contractor bids and publishes detailed remodeling cost guides. Useful for benchmarking quotes before signing anything.
Also check:
- Google Business listings: Look for consistent five-star patterns, but read the three-star reviews, they’re usually the honest ones.
- Nextdoor or local Facebook groups: Neighbors often share recent experiences, good and bad.
- State licensing boards: Many states require a contractor’s license or master plumber credential for work involving water supply and drainage. Verify active status online.
Questions to Ask Before Hiring an Installer
Once you’ve shortlisted two or three candidates, ask these upfront:
- Are you licensed, bonded, and insured? Request policy numbers and verify coverage directly with the carrier. General liability should be at least $500,000: workers’ comp protects you if someone gets hurt on-site.
- Do you pull permits when required? Code enforcement varies, but many jurisdictions require permits for plumbing modifications. A pro who skips this step can leave you liable during resale inspections.
- What’s included in your quote? Confirm whether it covers haul-away, supply-line replacement, caulk and sealant, and minor drywall patching.
- How do you handle surprises? Rot, mold, or out-of-square walls pop up often. Pin down whether change orders require written approval and how pricing adjusts.
- Can you provide references from jobs in the past six months? Recent work matters more than a portfolio from five years ago. Call at least two references and ask specifically about punctuality, cleanliness, and how they handled problems.
- What’s your timeline? A typical vanity swap takes four to six hours for a straightforward replacement, up to two days if plumbing or countertop templating is involved.
Red flags: no physical business address, pressure to pay the full amount upfront, reluctance to provide a written contract, or insistence that permits “aren’t necessary.”
What to Expect During Professional Vanity Installation
Understanding the workflow helps you prep the space and spot corners being cut.
Day-of preparation:
- Clear the bathroom completely, toiletries, rugs, wall hangings. Installers need elbow room.
- Shut off the water supply at the fixture valves or main line. If your shutoff valves are crusty and haven’t been turned in years, replace them beforehand to avoid mid-job failures.
- Protect finished flooring. Pros usually lay drop cloths, but tile or hardwood near the vanity should be covered to prevent scratches from dropped tools.
Step-by-step process:
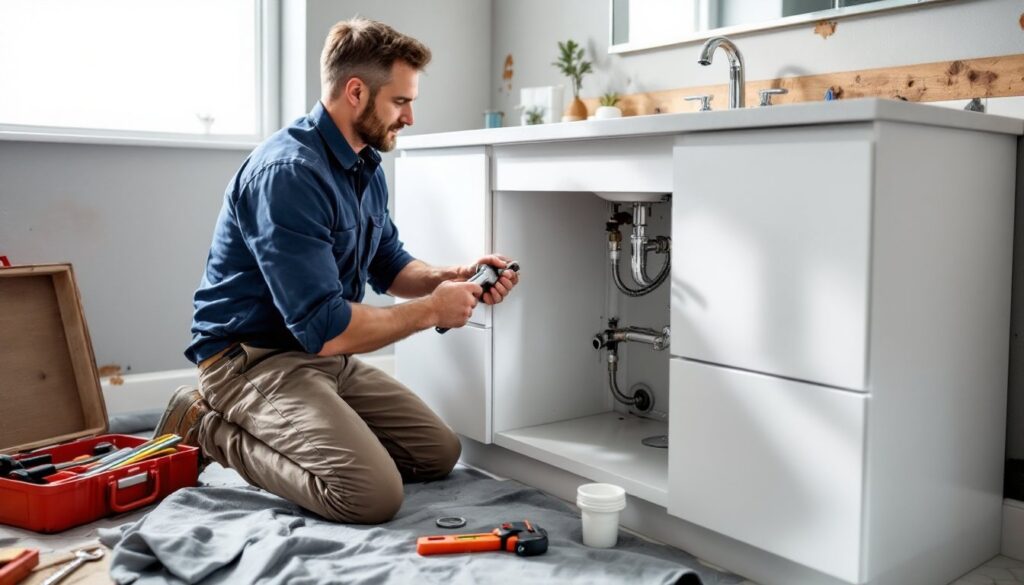
- Demolition: The installer disconnects supply lines and drain tailpiece, then removes the old vanity. If it’s caulked or screwed into studs, expect some prying and minor drywall touch-up.
- Inspection: A good pro checks for water damage on the subfloor and inside the wall cavity. Any soft spots or staining should be flagged immediately.
- Dry-fit: The new vanity is positioned to confirm drain and supply alignment. Wall-mounted units require locating studs with a stud finder and installing 2×6 or 2×8 blocking if none exists.
- Plumbing connections: Supply lines (usually braided stainless flex lines) attach to shutoff valves. The drain assembly, P-trap, tailpiece, and pop-up linkage, is assembled and hand-tightened, then snugged with a wrench. Over-tightening plastic nuts cracks them: pros know to stop at firm resistance.
- Leveling and anchoring: Vanities must sit level front-to-back and side-to-side, or the countertop seam will show gaps and water will pool. Installers use shims and check with a 4-foot level. Cabinet backs are screwed into studs with 3-inch cabinet screws.
- Countertop and sink: Drop-in and undermount sinks are sealed with plumber’s putty or silicone. The faucet and drain are installed, then everything is connected and tested.
- Final checks: The installer runs water for several minutes, checking for leaks at shutoff valves, supply connections, and drain joints. They’ll also check that doors and drawers operate smoothly and that caulk beads along the wall and countertop are clean.
Cleanup: Expect the installer to bag debris and wipe down surfaces. They shouldn’t leave standing water, drywall dust, or old caulk shavings behind.
Ask for a walkthrough before the installer leaves. Test faucet operation, open drawers, and inspect caulk lines. It’s easier to request a touch-up on the spot than to call someone back.
DIY vs. Professional Installation: Making the Right Choice
Not every vanity swap needs a pro, but some configurations demand licensed help, or at least a capable friend.
Go DIY if:
- You’re replacing a freestanding vanity with another of the same footprint, and the plumbing lines up within an inch.
- You’re comfortable using a basin wrench to reach shutoff nuts and can identify a slip-joint nut from a compression fitting.
- The existing vanity isn’t hiding structural issues (no sagging subfloor, no mold, no cracked tile).
- You have a level, adjustable wrench, hacksaw (for cutting tailpieces), and silicone caulk gun.
- Local code doesn’t require a permit for like-for-like replacement. (Check with your building department: rules vary.)
Call a pro if:
- You’re installing a wall-mounted or floating vanity. These require precise blocking between studs, often 3/4-inch plywood anchored with construction screws, and miscalculating load points can rip drywall anchors out.
- Plumbing stub-outs need relocation. Moving a drain more than a couple inches usually means cutting into the wall, rerouting ABS or PVC, and ensuring proper slope (1/4 inch per foot) to avoid clogs.
- The new vanity is significantly deeper or wider, requiring tile cuts, baseboard removal, or electrical outlet relocation.
- You’re dealing with old galvanized steel or polybutylene supply lines that haven’t been updated in decades. These are prone to sudden failure and often need replacement during renovation.
- Your area requires a licensed plumber’s signature on permit paperwork.
Time reality check: A confident DIYer can swap a straightforward vanity in four to six hours, assuming no surprises. First-timers often stretch that to a full weekend. Professionals bring speed, the right tools (like a close-quarters tubing cutter or right-angle drill), and insurance if something goes sideways.
Permit considerations: Many jurisdictions require permits for any work that alters water supply or drainage. A failed inspection can force you to tear out new work, and unpermitted plumbing can tank a home sale. When in doubt, call your local building department, or hire someone who knows the code.
If you’re handy but uncertain, consider a hybrid approach: hire a plumber to handle the rough-in and drain work, then finish the cosmetic steps (caulking, hardware, touch-up paint) yourself. Most pros are fine splitting tasks as long as expectations are clear upfront.
Conclusion
A well-installed vanity anchors your bathroom for years, literally and figuratively. Whether you hire bathroom vanity installers near me through a vetted platform or tackle a straightforward swap yourself, the key is matching the project scope to your skill level and your home’s quirks. Get multiple quotes, verify credentials, ask the uncomfortable questions, and don’t skip permits if your jurisdiction requires them. The difference between a clean, leak-free install and a slow drip behind the wall often comes down to an hour of careful prep and the willingness to call in help when the job demands it.