Table of Contents
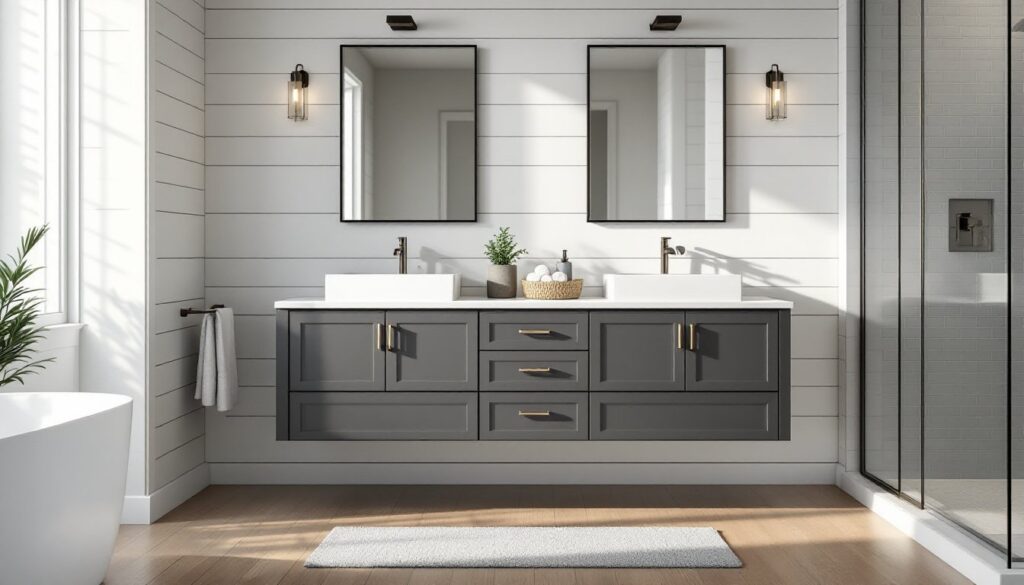
ToggleA 72-inch bathroom vanity is the Goldilocks of master bath fixtures, big enough to provide two full sink stations without overwhelming the room, yet compact enough to leave breathing space for a shower or tub. It’s the most popular size for new construction and remodels where couples want to avoid the morning traffic jam at a single sink. This guide walks through selecting the right style, configuration, and materials, then covers what it takes to install one without calling in backup, or when you should.
Key Takeaways
- A 72-inch bathroom vanity provides dual sink functionality with 36 inches of counter space per user while leaving adequate room for toilet placement, walkways, and towel bars in most master bathrooms.
- Modern 72-inch vanities with quartz tops range from $1,200–$3,000, while traditional solid wood options with stone tops cost $1,500–$4,500, and both styles should include adjustable shelves and plumbing cutouts.
- Proper installation requires anchoring to at least two studs, leveling the cabinet within 1/4 inch, measuring plumbing rough-in locations (drain 16–20 inches from back wall, supply lines 6–8 inches apart), and allowing 30–36 inches of clearance in front for accessibility.
- Undermount sinks provide a sleek look but require solid countertops, while vessel sinks add 5–7 inches of height and drop-in sinks are budget-friendly but show a rim that collects grime.
- A well-planned 72-inch bathroom vanity installation typically recoups 60–70% of remodeling costs at resale, especially in mid-range and higher-end homes seeking primary suite functionality.
- DIY installation is feasible in a full day for most homeowners, but hiring a licensed plumber for plumbing relocation, a carpenter for scribing out-of-level floors, or a professional for stone-topped units over 300 pounds ensures code compliance and proper fit.
Why a 72-Inch Vanity Is the Sweet Spot for Master Bathrooms
A 72-inch vanity delivers dual sink functionality without the footprint of an 84-inch or 96-inch unit. Most master bathrooms measure between 100 and 150 square feet, and a six-foot vanity leaves adequate clearance for toilet placement (minimum 15 inches from centerline to any obstruction per IRC) and a comfortable walkway.
The typical layout provides 36 inches of counter per user, enough space for toiletries, a tray, and elbow room. Compare that to a 60-inch double vanity, where each person gets 30 inches and storage starts feeling tight fast.
From a plumbing standpoint, a 72-inch cabinet usually accommodates two undermount or vessel sinks spaced 36 to 40 inches apart on center. That spacing keeps drain lines from interfering with each other inside the cabinet and gives each user a dedicated medicine cabinet or mirror zone above.
Standard bathroom layouts feature vanities along an 8-foot or 10-foot wall. A 72-inch unit leaves 12 to 24 inches on each side for towel bars, hamper space, or a linen tower. It’s large enough to make a visual statement but won’t box you into a narrow galley feel.
Resale value matters, too. Buyers expect double sinks in a primary suite. A well-planned bathroom remodel that includes a double vanity typically recoups 60–70% of cost at sale, especially in mid-range and higher-end homes.
Top Styles and Materials for 72-Inch Bathroom Vanities
Choosing a vanity means balancing aesthetics with durability. Bathroom humidity and daily use demand materials that can handle moisture without warping or delaminating.
Modern and Contemporary Designs
Floating vanities mount to wall studs with a French cleat or heavy-duty brackets, leaving floor space visible underneath. They look sharp in modern baths and make mopping easier, but installation requires hitting studs, drywall anchors won’t cut it for a 200-pound cabinet loaded with stone.
Materials lean toward high-gloss lacquer, thermofoil, or engineered wood with waterproof edge banding. Countertops are typically quartz or solid surface in white, gray, or black. Integrated sinks, where the counter and basin are one piece, eliminate seams and grout lines.
Hardware is minimal: straight pulls in brushed nickel, matte black, or polished chrome. Soft-close drawer glides are standard. Expect to pay $1,200 to $3,000 for a quality modern 72-inch vanity with quartz top, depending on finish and brand.
Traditional and Transitional Options
Freestanding vanities with furniture-style legs or bracket feet suit traditional and transitional bathrooms. Look for solid wood face frames (maple, oak, or birch) or plywood box construction with dovetail drawer boxes. Avoid particleboard cores in humid environments, they swell and sag.
Countertops include granite, marble, or engineered quartz. Marble looks classic but requires sealing every six months and etches from acidic products. Granite is more forgiving. Quartz offers the look of stone without the maintenance.
Finishes range from painted white or gray to stained walnut or espresso. Shaker-style doors are the most versatile: raised-panel doors skew traditional. Oil-rubbed bronze, antique brass, or brushed gold hardware completes the look.
Traditional vanities often include open shelving or towel bars on the ends. Count on $1,500 to $4,500 for a solid wood vanity with stone top. Custom or semi-custom builds push that higher.
Both styles should have adjustable shelves inside and cutouts for plumbing. A center drawer bank between the two sinks is a nice feature, perfect for shared items like a hair dryer or extra hand towels.
How to Choose the Right Configuration for Your Space
Measure twice, order once. A 72-inch vanity is only the cabinet width, add faucet width and any side splash if applicable.
Wall-to-wall fit: Measure the clear span between walls. If it’s exactly 72 inches, you’ll need to scribe or shim. Leave at least 1/4 inch clearance on each side for installation wiggle room. Baseboards and trim complicate things, you may need to notch the vanity sides or remove and reinstall trim after the cabinet goes in.
Plumbing rough-in: Standard sink drain rough-in is 16 to 20 inches from the back wall and centered under each basin. Check your existing plumbing locations. If drains are off-center, you can use offset P-traps, but it’s cleaner to have a plumber re-route before the vanity arrives. Water supply lines should be 6 to 8 inches apart (hot on the left per convention) and about 20 inches above the finished floor.
Depth: Most vanities are 21 to 22 inches deep, not including countertop overhang. Confirm clearance to the opposite wall or toilet. Building codes require 30 inches of clearance in front of a vanity for accessibility, though 36 inches is more comfortable, especially if you mention dimensions in your bathroom planning resources.
Sink style: Undermount sinks are sleek and easy to wipe into, but they require a solid countertop material (stone or solid surface). Vessel sinks sit on top, adding 5 to 7 inches of height, factor that into mirror and faucet placement. Drop-in sinks are budget-friendly and DIY-friendly but show a rim that collects grime.
Storage layout: Count drawers vs. doors. Drawers offer better access to the back of the cabinet and keep items organized, but they cost more. A combo, two or three drawers on top, doors below, is a good middle ground. Soft-close hinges and glides aren’t just luxury: they extend hardware life.
Faucet mount: A single-hole faucet is simplest. Widespread faucets (separate handles and spout) need three holes drilled 8 inches apart on center. If the countertop doesn’t come pre-drilled, confirm your fabricator or installer will do it, drilling quartz or granite isn’t a DIY task for most people.
Installation Tips and What to Expect
Installing a 72-inch vanity is a full-day project for most DIYers, or 3–4 hours for a pro. It’s not especially difficult, but there’s no margin for error once the countertop is glued down.
Prep work:
- Shut off water at the fixture valves or main if valves are old or leaking. Open faucets to drain residual pressure.
- Remove the old vanity. Disconnect P-traps (have a bucket ready), unscrew supply lines, and cut any caulk along the wall and floor. If it’s a big unit, remove drawers and doors first to lighten the load.
- Inspect the wall. A 72-inch vanity needs to anchor into at least two studs. Standard stud spacing is 16 inches on center, so you should hit three or four. Use a stud finder and mark locations. Patch any holes or damage and let spackle dry.
- Check the floor. It should be level within 1/4 inch over 6 feet. Use shims under the vanity legs or cabinet base if it’s not. An unlevel vanity will cause doors to swing open or drawers to roll.
Installation steps:
- Dry-fit the cabinet. Slide it into place and check plumbing clearances. Mark where supply and drain lines enter the cabinet back. Remove and drill holes, 1 1/2 inches for drains, 1 inch for supply lines. Add 1/4 inch for wiggle room.
- Secure the cabinet. Slide it back, level it front-to-back and side-to-side with shims, then drive 3-inch cabinet screws through the back rail into studs. Two screws per stud is plenty. Don’t overtighten, you can crack the cabinet.
- Attach the countertop. Freestanding vanities often use silicone adhesive or L-brackets from underneath. Floating vanities may have the top fastened before wall-mounting. Follow manufacturer instructions. If you’re templating for custom stone, do that before final cabinet install, fabricators need exact measurements.
- Install sinks and faucets. Undermount sinks attach with clips and epoxy from below. Vessel sinks sit on a bead of silicone. Follow the faucet manufacturer’s instructions for mounting, some require a separate deck plate or spacer.
- Connect plumbing. Attach braided supply lines to shutoff valves, don’t reuse old ones. Hand-tighten, then give them a quarter turn with a wrench. Assemble P-traps and tighten slip nuts. Check for leaks by running water for several minutes and inspecting joints with a paper towel.
- Seal edges. Run a bead of 100% silicone caulk (not acrylic latex) along the backsplash and side joints. Wet your finger or use a caulk tool for a smooth finish. Let cure 24 hours before heavy use.
Safety notes: Wear safety glasses when drilling tile or cutting through old caulk, chips fly. Use a dust mask if sawing or sanding. A wet/dry vac helps manage mess.
When to call a pro: If you’re moving plumbing more than a few inches, hire a licensed plumber, contractor-sourced projects ensure code compliance. If the vanity is stone-topped and weighs over 300 pounds, get help lifting. If walls aren’t plumb or the floor is badly out of level, a carpenter can shim and scribe properly.
Conclusion
A 72-inch vanity transforms a master bath from functional to luxurious without requiring a teardown. It’s big enough to end sink-sharing squabbles and small enough to fit most existing layouts. Choose materials that suit your style and humidity tolerance, measure carefully, and don’t rush the install, level matters more than speed. Done right, it’s a weekend upgrade that pays dividends every morning.