Table of Contents
ToggleA 36-inch vanity hits the Goldilocks zone for most bathroom remodels, big enough for meaningful storage and counter space, compact enough to leave room for a toilet and shower without playing spatial Tetris. Whether replacing a cramped pedestal sink or upgrading an outdated builder-grade unit, a well-chosen 36-inch vanity transforms both function and aesthetics. But walk into any home center and the options multiply: freestanding or floating, single basin or offset, solid wood or engineered, soft-close drawers or old-school doors. This guide cuts through the showroom noise to help buyers choose, install, and maximize a 36-inch bathroom vanity with sink.
Key Takeaways
- A 36 bathroom vanity with sink provides the ideal balance of storage and counter space (24–28 inches usable) while maintaining layout flexibility in most standard bathrooms.
- Choose between freestanding vanities for easier installation and traditional aesthetics, or floating models for modern, minimalist spaces and easier floor cleaning.
- Invest in solid wood cabinet construction, dovetail drawer joints, and water-resistant finishes to ensure durability; quartz countertops offer the best balance of affordability and stain resistance.
- Verify that drain and supply line positions match your new 36-inch vanity layout before installation, as misalignment may require plumbing rerouting and additional costs.
- Maximize your 36-inch vanity’s functionality with drawer dividers, pull-out trays, door-back organizers, and minimal countertop clutter to create an organized, efficient bathroom space.
- DIY installation of a freestanding unit is manageable in 4–6 hours, but hire a professional plumber or electrician if the project involves moving plumbing significantly or relocating electrical outlets.
Why a 36-Inch Vanity Is the Sweet Spot for Most Bathrooms
The 36-inch width balances usability and space efficiency in ways smaller and larger units can’t match. It provides roughly 24 to 28 inches of usable counter space after accounting for the sink basin, enough for everyday toiletries, a soap dispenser, and a decorative touch without clutter. Compare that to a 24-inch vanity, which often forces users to store items elsewhere, or a 48-inch unit that dominates smaller bathrooms and complicates door swing clearances.
Most single-occupant bathrooms, hall baths, powder rooms, and guest baths, measure between 40 and 60 square feet. In these spaces, a 36-inch vanity leaves adequate clearance for the toilet (building codes typically require 15 inches from centerline to any obstruction) and allows a comfortable path to the shower or tub. It’s also the widest standard size that fits through most doorways without disassembly, simplifying delivery and installation.
From a cost perspective, 36-inch vanities sit in the manufacturing sweet spot. They’re mass-produced across style ranges, so shoppers find more options and better price-per-feature value than with niche sizes. Cabinet interiors typically include one or two drawers plus a shelf, offering storage proportional to the footprint without wasted dead space common in larger cabinets.
Types of 36-Inch Bathroom Vanities: Finding Your Style
Freestanding vs. Wall-Mounted Vanities
Freestanding vanities rest directly on the floor and account for the majority of 36-inch models. They’re structurally simpler to install, no wall reinforcement required, and their enclosed toe kicks hide plumbing. Traditional, transitional, and farmhouse styles almost always use freestanding cabinets. Drawback: cleaning around the base can be tedious, and floor-level storage means bending to access lower shelves.
Wall-mounted (floating) vanities attach to studs via a mounting rail or French cleat, leaving floor space visible beneath. This creates an airy, modern look and makes mopping a one-swipe affair. But, they demand solid backing, ideally 2×6 or 2×8 blocking installed between studs during framing. Retrofit installations often require opening drywall to add reinforcement, since standard 1/2-inch drywall and toggle bolts won’t reliably support 100+ pounds of loaded cabinet. Wall-mount models also expose plumbing, so expect to see the P-trap unless the designer specifies a bottle trap or concealed waste arm.
Style ecosystems like modern minimalist spaces favor floating vanities for their clean lines, while freestanding units fit better in traditional or transitional baths where architectural detail matters more than visual weightlessness.
Single Sink vs. Offset Sink Configurations
Most 36-inch vanities feature a centered single sink, typically an undermount, drop-in, or integrated basin ranging from 16 to 20 inches wide. Centered sinks split counter space evenly, making them intuitive for solo users and symmetrical design layouts.
Offset sink configurations push the basin to one side, usually the right, freeing up a larger continuous counter area on the opposite side. This layout suits users who need uninterrupted space for cosmetics, grooming tools, or a tray organizer. The tradeoff: offset sinks create awkward under-cabinet plumbing routes and may feel visually unbalanced unless flanked by intentional design elements like a tall cabinet or open shelving.
Integrated sinks (where basin and countertop are one molded piece of cultured marble, quartz, or solid-surface material) simplify cleaning, no sink-to-counter seam to caulk, but limit replacement options. If the sink chips or stains, the entire top needs replacement. Undermount sinks paired with quartz or granite offer more flexibility and a sleeker profile but require proper sealing and support during installation.
What to Look for When Shopping: Key Features and Materials
Cabinet construction separates budget models from long-term investments. Solid wood frames (often poplar or oak) with plywood box construction resist moisture better than particleboard or MDF cores, which swell and delaminate when exposed to humidity. Check for dovetail drawer joints rather than stapled or glue-only corners, they hold up under the daily pull of wet hands.
Finish quality matters in bathrooms. Look for water-resistant topcoats (polyurethane or conversion varnish) rather than basic paint, especially on lower doors and drawers where splash exposure is highest. Soft-close hinges and drawer glides aren’t just luxury, they prevent the hard slams that crack joints and loosen hardware over years of use.
Countertop material affects both aesthetics and durability. Quartz (engineered stone) offers the best balance: non-porous, stain-resistant, available in countless colors, and priced moderately. Granite brings natural variation but requires periodic sealing. Cultured marble and solid-surface options (like Corian) integrate seamlessly with sinks but scratch more easily than stone. Laminate remains the budget choice, acceptable for low-traffic guest baths but prone to edge wear and water damage at seams.
Sink type and depth influence usability. Undermount sinks (mounted below the counter) make it easy to wipe debris directly into the basin. Drop-in (self-rimming) sinks install faster and cost less but create a lip that collects grime. Basin depth should be at least 5 to 6 inches to contain splashing during handwashing, especially in family bathrooms.
Platforms like Houzz’s vanity collections showcase the range of finishes and hardware styles available, from matte black industrial pulls to brushed nickel traditional knobs. Choose hardware that complements existing fixtures (faucet, towel bars, lighting) to maintain visual cohesion.
Installation Tips: DIY or Hire a Pro?
Installing a freestanding 36-inch vanity is a manageable DIY project for anyone comfortable with basic plumbing and leveling. Budget four to six hours for a straightforward swap. The process involves shutting off water supply lines, disconnecting the P-trap, removing the old vanity, checking floor level (shim as needed), positioning the new unit, securing it to wall studs with 3-inch cabinet screws, reconnecting plumbing, and applying a bead of silicone caulk along the wall and floor seams.
Critical step: Verify the drain and supply line positions match the new vanity layout. Most 36-inch vanities expect the drain centered at 18 inches from either side and supply lines 4 inches apart, centered at the same point. If the old plumbing doesn’t align, expect to extend or reroute, sometimes a simple slip-joint extension works, other times a P-trap reconfiguration is necessary.
Wall-mounted installations raise the difficulty. These require locating studs (typically 16 inches on center), installing a mounting bracket or ledger board rated for the vanity’s weight (check manufacturer specs, usually 150 to 200 pounds), and ensuring the unit sits perfectly level, any tilt stresses the cabinet joints and distorts drawer operation. If studs don’t align with the vanity’s mounting holes, install a horizontal backer board spanning at least two studs to distribute the load. This often means opening drywall, adding 2×8 blocking, then patching and repainting.
When to hire a pro: If the project involves moving plumbing more than a few inches, rerouting vent stacks, or working in a home with PEX, copper, or galvanized supply lines that need soldering or crimping, call a licensed plumber. Similarly, if electrical outlets need relocation to accommodate the new vanity height (common with wall-mount units), hire an electrician to ensure NEC-compliant GFCI protection and proper box placement.
Tools needed for DIY installation: Adjustable wrench, basin wrench (for tight supply line nuts), level (at least 24 inches), drill/driver, stud finder, utility knife, caulk gun, and a bucket for P-trap water. A second pair of hands helps with lifting and leveling, especially if the countertop and cabinet ship as separate pieces.
Maximizing Storage and Functionality in a 36-Inch Vanity
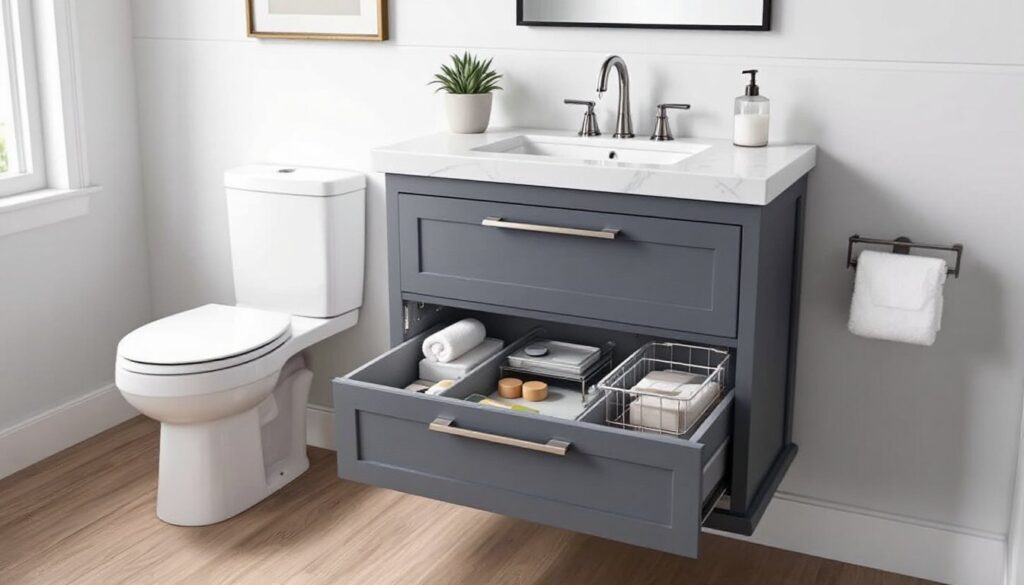
A 36-inch footprint won’t swallow bulk storage, so smart interior organization makes the difference between a functional vanity and a cluttered drawer game of Tetris. Drawer dividers, either adjustable peg systems or custom-cut foam inserts, corral small items like cosmetics, razors, and cotton swabs. Without them, items migrate into corners and stack haphazardly.
Pull-out trays in the cabinet base make accessing items stored behind the P-trap easier. Standard cabinets waste the area flanking the plumbing: a U-shaped pull-out shelf reclaims that dead space. Some manufacturers offer factory-installed pull-outs, but aftermarket options from hardware suppliers fit most 36-inch cabinets with minor modifications.
Vertical space often goes unused. Mounting a slim pull-out tower or door-back organizer adds slots for hair tools, cleaning supplies, or extra toiletries. Magnetic strips on interior door panels hold tweezers, nail clippers, and other metal items, keeping them visible and accessible.
Medicine cabinets or open shelving above the vanity extend storage without increasing the vanity’s footprint. Recessed medicine cabinets fit between studs (standard depth: 3.5 inches for 2×4 walls), while surface-mount models add 4 to 6 inches of projection. Open shelves suit minimalist aesthetics showcased on sites like Homify but require disciplined curation to avoid visual clutter.
Countertop real estate demands discipline. Limit permanent residents to daily essentials, hand soap, toothbrush holder, one or two decorative elements. Everything else belongs inside. A small tray or ceramic dish corrals rings and earrings during handwashing, preventing loss down the drain.
For families, consider vanities with two drawers instead of one drawer plus cabinet doors. Drawers provide easier access and better visibility, especially for kids who won’t dig through a dark cabinet to find toothpaste. Soft-close mechanisms prevent slammed fingers, an underrated safety feature in homes with young children.