Table of Contents
ToggleSmall bathrooms need big ideas, and a bathroom vanity with linen tower combo delivers both storage and style without eating up square footage. These integrated units combine the sink cabinet with a vertical linen closet in one cohesive piece, or two pieces designed to look like one. For homeowners wrestling with towel piles on the toilet tank or toiletries crammed under the sink, this setup is a game-changer. It’s also a DIY-friendly upgrade that doesn’t require knocking down walls or rerouting plumbing. Whether you’re renovating a half-bath or overhauling a master suite, understanding how these combos work, and how to choose and install the right one, can save time, money, and a lot of frustration.
Key Takeaways
- A bathroom vanity with linen tower combo combines a sink vanity with a tall, narrow storage cabinet (60–84 inches tall) to maximize vertical space in small bathrooms without consuming floor area.
- These integrated units save 60–70% compared to custom cabinetry, typically costing $800–$2,500 versus $4,000–$6,000+ for custom built-ins while delivering a cohesive, high-end design.
- Accurate measurements, plumbing rough-in verification, and material selection (water-resistant plywood or solid wood for humid bathrooms) are critical steps before purchasing to avoid costly relocations and moisture damage.
- Side-by-side configurations with proper door clearance and reversible hinge options provide flexible layouts for most bathrooms with 60–72 inches of continuous wall space.
- Anchor vanity and tower cabinets directly to wall studs using 2.5–3-inch screws and use braided stainless-steel supply lines to ensure stability, prevent tipping, and reduce leak risk during installation.
- DIY installation is feasible for most homeowners when plumbing rough-in is standard; prioritize quality soft-close hardware, adjustable shelving, and thorough water-testing before considering the project complete.
What Is a Bathroom Vanity with Linen Tower Combo?
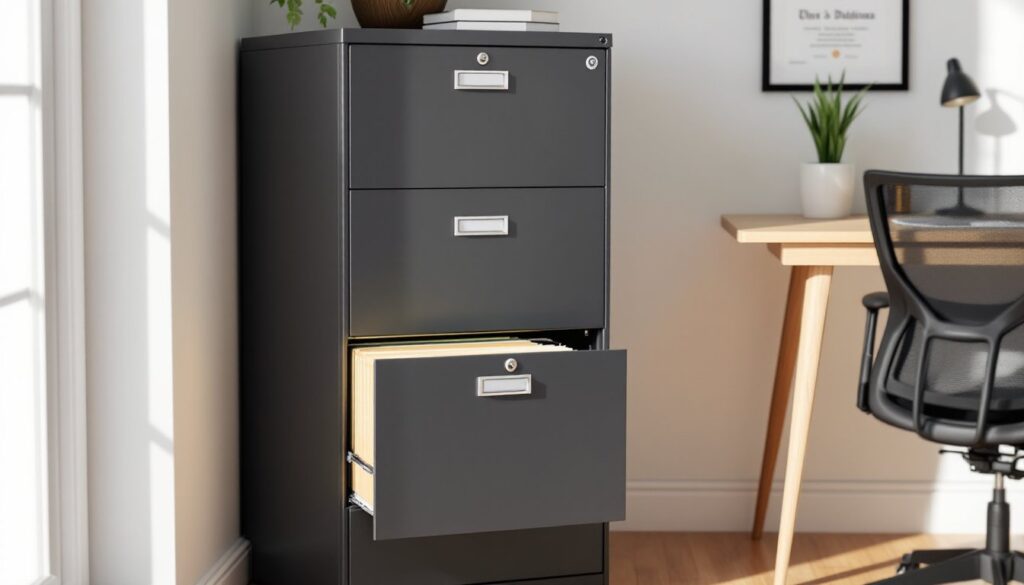
A bathroom vanity with linen tower combo pairs a standard sink vanity with a tall, narrow cabinet (the linen tower) in one coordinated package. The vanity holds the sink, plumbing, and typically includes drawers or cabinet space below. The linen tower, usually 60 to 84 inches tall and 12 to 18 inches wide, provides vertical storage for towels, toiletries, cleaning supplies, and other bathroom essentials.
These combos come in two main formats: fully assembled single units where the vanity and tower share a common countertop or side panel, and modular two-piece sets that sit side by side but ship separately. The modular versions are easier to move through doorways and hallways, especially in older homes with narrow stairs.
Most combos use matching finishes, hardware, and door styles to create a built-in look without custom cabinetry costs. Common materials include solid wood (oak, maple), engineered wood with veneer, MDF with painted or thermofoil finishes, and occasionally plywood carcasses for better moisture resistance. Countertop materials vary: cultured marble, engineered quartz, solid surface, and natural stone are all options, depending on budget and durability needs.
Some brands offer a bathroom vanity with attached linen cabinet as a single-piece unit, which simplifies installation but limits configuration flexibility. Others provide freestanding towers that can be positioned on either the left or right side of the vanity, giving homeowners more layout control.
Key Benefits of Choosing a Vanity and Linen Tower Combo
Maximized vertical space is the headline benefit. In bathrooms where floor space is tight, going up instead of out keeps the room functional without crowding the toilet or shower entry. A linen tower can hold as much as a traditional linen closet while occupying less than two square feet of floor area.
Cohesive design is another big win. Mixing and matching separate vanities and storage pieces often results in mismatched finishes, different hardware styles, and a cluttered visual feel. Combos solve this by offering factory-matched components. When browsing design inspiration galleries, you’ll notice that unified cabinetry elevates the perceived quality of the entire bathroom.
Simplified installation saves time and hassle. Instead of sourcing a vanity from one supplier, a tower from another, and coordinating delivery schedules, everything arrives together with matching installation templates. For DIYers, this means fewer variables and less guesswork when measuring rough-in dimensions.
Cost efficiency compared to custom cabinetry is significant. A mid-range combo typically runs $800 to $2,500, while custom built-ins for the same storage volume can easily exceed $4,000 to $6,000 once you factor in design fees, fabrication, and installation labor. Stock and semi-custom combos deliver 80% of the look for a fraction of the price.
Resale appeal shouldn’t be overlooked. Buyers consistently rank bathroom storage high on their wish lists. A well-executed vanity and linen tower combo signals thoughtful design and adds perceived value, especially in homes where closet space is limited.
Popular Configuration Options and Layouts
Side-by-Side Configurations
Side-by-side layouts place the vanity and linen tower next to each other along the same wall. This is the most common setup and works well in bathrooms with at least 60 to 72 inches of continuous wall space. The vanity typically measures 30 to 48 inches wide, while the tower adds another 12 to 18 inches.
When planning a side-by-side install, consider door swing clearance. A linen tower door that opens into the toilet or shower entry creates a bottleneck. Right-hand or left-hand hinge options are often available, confirm this before ordering. Some manufacturers offer reversible doors, but not all: check the specs.
Plumbing access is easier with side-by-side setups because the tower doesn’t interfere with the vanity’s drain or supply lines. If the vanity has a center-mounted sink, you’ll have more flexibility in tower placement. Offset sinks (left or right) may require the tower on the opposite side to balance the look.
Integrated and Built-In Designs
Integrated designs treat the vanity and tower as a single furniture piece, often sharing a continuous countertop or a common toe kick. These units create a seamless, high-end appearance and are popular in bathroom remodeling projects aiming for a custom look on a semi-custom budget.
Some integrated combos use a shared side panel between the vanity and tower, reducing material costs and creating a true built-in aesthetic. The downside: if one component is damaged or needs replacement, you may have to replace both.
Stacked configurations are less common but worth mentioning. In extremely tight spaces, a few manufacturers offer wall-hung vanities with a shallow linen cabinet mounted directly above. These work best in powder rooms or narrow ensuites where floor space is at a premium. Just verify that wall studs or blocking can support the combined weight, typically 150 to 250 pounds fully loaded. Use 3-inch wood screws into studs or install 1×6 or 2×6 blocking between studs during framing if you’re building new or walls are open.
How to Choose the Right Combo for Your Bathroom
Start with accurate measurements. Measure wall width, ceiling height, and the distance from the wall to any obstacles (toilet, tub, door swing). Account for baseboard and trim, many homeowners forget to measure from the wall surface, not the trim, and end up with a vanity that doesn’t sit flush.
Check your plumbing rough-in dimensions. Standard bathroom sinks have drain centers 18 to 24 inches from the back wall and supply lines typically 20 to 22 inches off the floor. If your combo’s vanity doesn’t align, you’ll need a plumber to relocate lines, a job that can add $200 to $500 depending on access and local rates.
Door and drawer operation matters more than most people think. Soft-close hinges and drawer glides are worth the upcharge: they reduce wear and tear and make the cabinets feel more expensive. Test floor models in person if possible. Open and close doors and drawers multiple times, cheap hardware binds, sags, or squeaks within months.
Material and finish durability should match your household’s moisture exposure. Bathrooms with poor ventilation or heavy shower use need water-resistant materials like plywood carcasses, solid wood frames, and high-quality paint or sealed veneer. Particleboard and MDF are fine in well-ventilated spaces, but they’ll swell and delaminate if repeatedly exposed to steam. When evaluating options on platforms like Houzz, pay attention to user reviews mentioning moisture damage or finish peeling.
Countertop overhang and backsplash height affect both aesthetics and function. A 1-inch overhang on the front and sides protects cabinet edges from water drips. Standard backsplash height is 4 inches, but many combos now offer 6 to 8-inch backsplashes or even full-height side splashes for extra protection.
Storage configuration inside the linen tower varies widely. Adjustable shelves are more versatile than fixed ones, look for units with multiple shelf pin holes spaced every 1 to 2 inches. Some towers include pull-out hampers, tilt-out bins, or built-in outlets for hair tools. Decide what you’ll store before buying: a tower with five shallow shelves won’t hold bulky towels as well as one with three deeper shelves.
Installation Tips for DIY Homeowners
Prep the space thoroughly. Remove the old vanity, patch and paint the wall, and confirm the floor is level. Out-of-level floors cause cabinets to rock and doors to hang crooked. Use shims (cedar or composite, not pine, it compresses) to level the vanity before securing it. A 2-foot or 4-foot level is essential: don’t rely on eyeballing it.
Shut off water and confirm it’s off. Turn the shut-off valves clockwise until snug, then open the faucet to release pressure. Keep a bucket and rags handy, old supply lines often leak or break when disconnected.
Assemble modular components before moving them into place. Linen towers and vanities often ship with doors, shelves, and hardware loose to prevent shipping damage. Lay out all parts, check the instruction manual, and assemble on a clean, flat surface. Pre-drill pilot holes if you’re attaching anything to the back or side panels: MDF and particleboard split easily without them.
Anchor to wall studs, not just drywall. Vanities and towers must be secured to prevent tipping, especially if kids or pets are in the home. Use a stud finder to locate framing, then drive 2.5-inch to 3-inch wood screws through the cabinet’s hanging rail or back panel into the studs. If studs don’t line up, install a 1×4 ledger board horizontally between studs at the cabinet’s mounting height, secured with screws into each stud, then attach the cabinet to the ledger.
Connect plumbing carefully. Use new braided stainless-steel supply lines, they’re more reliable than old chrome or plastic ones and cost under $10 each. Hand-tighten connections first, then give them a quarter turn with a wrench. Over-tightening cracks fittings. Apply a bead of silicone caulk around the sink rim where it meets the countertop (if it’s an undermount or drop-in install) and along the backsplash where it meets the wall. Tool the caulk smooth with a wet finger or caulk tool, don’t leave a lumpy bead.
Test everything before calling it done. Turn the water back on slowly and check for leaks at supply lines, shut-off valves, and the drain P-trap. Let the water run for a full minute. Open and close all doors and drawers to confirm proper alignment and clearance. If a door hits the tower or a drawer binds, adjust the hinges or slides, most modern hardware has built-in adjustment screws for fine-tuning.
Safety note: Wear safety glasses when drilling into tile or cutting materials, and use a dust mask if sanding or cutting MDF (the dust is irritating). If you’re working with a wall-hung vanity or a heavy integrated combo, get a second set of hands. Dropping a 100-pound vanity on your foot or tweaking your back isn’t worth the solo effort.
Most bathroom vanity with linen tower combos are well within DIY skill range. If your plumbing rough-in is non-standard, your walls are badly out of plumb, or you’re dealing with cast-iron drains, consider hiring a plumber for the rough-in work and handling the cabinet install yourself. The cabinet part is straightforward: the plumbing is where most DIY headaches happen.