Table of Contents
ToggleA 5×7 bathroom, 35 square feet, hits the sweet spot for most homes. It’s tight enough to keep costs reasonable but roomy enough to fit a full tub, vanity, and toilet without the sardine-can feel of a powder room. Whether you’re gutting a cramped bath or carving out space in a new addition, a well-planned 5×7 layout delivers comfort and function. Most builders default to this footprint for secondary baths because it meets code, fits standard fixtures, and doesn’t eat up valuable living area. But making it work well means understanding clearances, plumbing runs, and how to position each piece so nothing feels crammed.
Key Takeaways
- A 5×7 bathroom layout meets building codes while offering 35 square feet of functional space ideal for secondary baths, spare bedrooms, and cost-effective renovations.
- Single-wall and L-shaped configurations each offer different trade-offs—single-wall layouts minimize plumbing complexity and costs, while L-shaped designs create a more spacious feel at the expense of additional pipe runs.
- Proper clearances (21 inches in front of fixtures, 15 inches from toilet centerline) and careful door swing planning are essential to avoid cramped mornings and costly layout adjustments.
- Vertical storage, recessed niches, and large-format tile maximize the perceived space in a 5×7 bathroom without major structural changes.
- Common mistakes like undersized exhaust fans, poor ventilation ducting, overlooking plumbing access, and test-fitting fixtures before installation can lead to mold growth, costly repairs, and buyer remorse.
- Lighting layers, light-colored tile, frameless glass enclosures, and compact wall-hung fixtures transform a 5×7 bathroom from cramped to comfortable while maintaining code compliance and resale appeal.
Why a 5×7 Bathroom Is the Perfect Size for Most Homes
The 5×7 footprint (or its close cousin, the 7×5 bathroom layout) strikes a balance between code compliance and real-world usability. The International Residential Code (IRC) requires 21 inches of clear space in front of toilets and vanities, plus at least 30 inches of width at the fixture itself. A 5×7 layout meets these minimums while leaving enough room to swing a door, step out of the shower without colliding with the sink, and maneuver during construction or future repairs.
From a cost perspective, a 5×7 bathroom keeps material waste low. Standard bathtubs run 60 inches long, perfect for the long wall of a 7-foot dimension. Drywall sheets are 48 inches wide, and tile boxes often cover 15–20 square feet, so a 35-square-foot room minimizes cutoffs and returns. Plumbing runs stay short when fixtures cluster on one or two walls, which cuts down on PEX or copper piping, fittings, and labor.
This size also fits neatly into most floor plans. In a ranch or two-story colonial, a 5×7 bath tucks between bedrooms, borrows space from a hallway, or backs up to a kitchen or laundry room to share a wet wall. Sharing a plumbing wall, where the toilet, shower, and sink drains all stack or run parallel, can save hundreds in rough-in costs and make future maintenance easier. For homeowners adding a bathroom in a basement or attic, 35 square feet is often the maximum they can carve out without sacrificing a closet or triggering major structural changes.
Essential Fixtures: What Fits in a 5×7 Bathroom Layout
A full 5×7 bathroom typically includes a 60-inch alcove tub/shower combo, a standard toilet, and a vanity in the 24- to 36-inch range. Let’s break down what works, and what doesn’t.
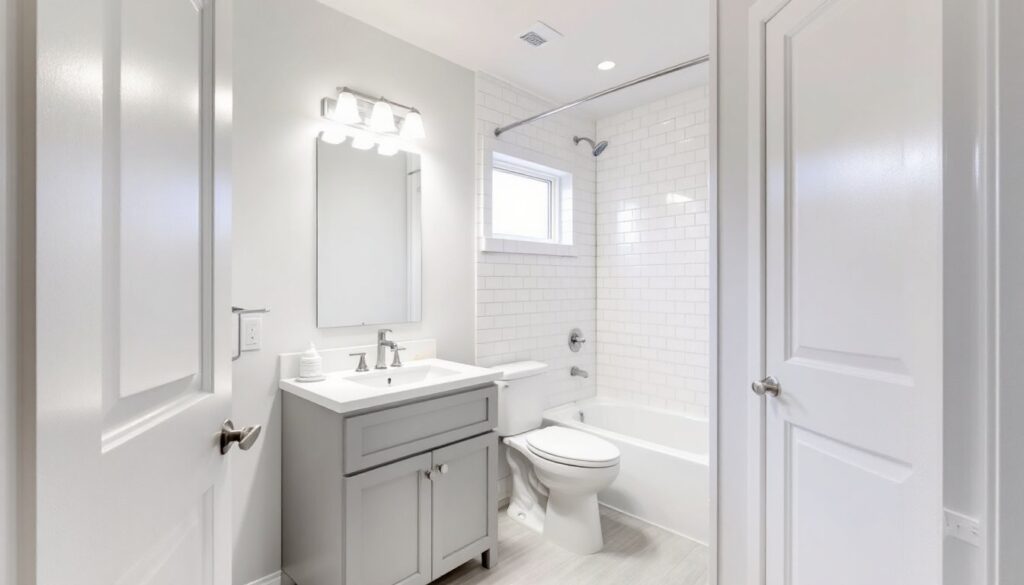
Tub/Shower Combo: A standard alcove tub measures 60 inches long by 30–32 inches wide. This fits snugly along the 7-foot wall, leaving a few inches for drywall, backer board, and tile. If a tub isn’t necessary, a 36-inch square shower stall or a 32 x 48–inch neo-angle unit opens up floor space and can make the room feel larger. Prefab fiberglass units install faster than tile surrounds, but tile offers better waterproofing and resale appeal if done right, use a waterproof membrane like Schluter Kerdi or RedGard over cement board.
Toilet: A standard round-front toilet has a 28-inch depth from the wall: an elongated bowl adds about 2 inches. Elongated bowls are more comfortable but eat into clearance. The IRC requires 15 inches from the toilet centerline to any wall or fixture, so measure carefully. Comfort-height toilets (17–19 inches tall) meet ADA guidelines and are easier on knees but may look bulky in a compact bath.
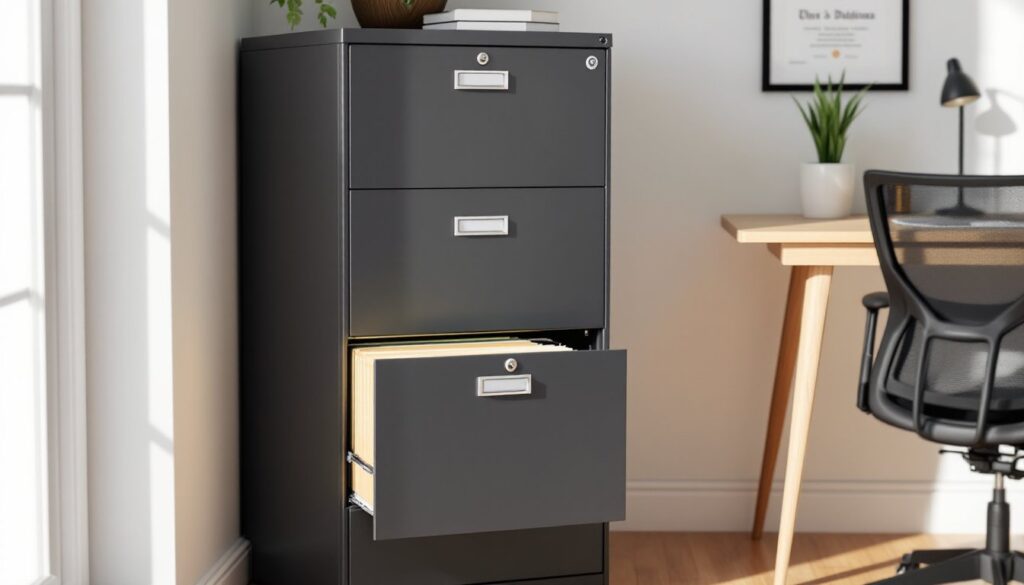
Vanity: A 24-inch vanity is the minimum that doesn’t feel like a toy: 30 or 36 inches gives usable counter space for toiletries and looks more finished. Wall-hung vanities can free up floor area and simplify cleaning, though they require blocking between studs during framing. Pair the vanity with a medicine cabinet or recessed shelving between studs to avoid protruding storage that shrinks the room.
Door Swing: Don’t forget the door. A standard 30-inch interior door swings into the room and needs about 30 inches of clear floor in its arc. If space is tight, consider a pocket door or an outswing door (though outswing doors can block hallways). Pocket doors require a 2×6 or 2×4 stud pocket in the wall, so plan this during framing, it’s nearly impossible to retrofit without tearing out drywall.
Best 5×7 Bathroom Layout Configurations
Two layouts dominate the 5×7 footprint: single-wall and L-shaped. Each has trade-offs in plumbing complexity, clearance, and how the room feels when you walk in.
Single-Wall Layout
In a single-wall configuration, the tub, toilet, and vanity line up along one 7-foot wall. This clusters all plumbing on a single wet wall, which simplifies rough-in and keeps drain and supply lines short. It’s the cheapest layout to build and the easiest to frame, especially if the bathroom backs up to a kitchen or another bath.
The tub typically sits at one end of the 7-foot wall, the toilet in the middle, and the vanity at the far end. This gives you a straight line of sight from the door and keeps the toilet somewhat private if the door is on the opposite wall. But, it can feel narrow, you’re always looking down a corridor of fixtures. To counter this, designers often place the door on the 5-foot wall opposite the vanity, so you face the sink rather than the toilet when you enter.
One challenge: meeting code clearances. If the door swings into the room on the 5-foot wall, its arc can collide with the toilet or vanity. Double-check that you have 21 inches of clear space in front of each fixture after the door is fully open. A pocket door solves this but costs more and requires wall thickness.
L-Shaped Layout
An L-shaped layout splits fixtures across two adjacent walls, typically placing the tub along the 7-foot wall and the toilet and vanity along the 5-foot wall. This opens up the center of the room and gives a more spacious feel. It’s popular for home design galleries showcasing modern baths because the layout photographs well and feels less tunnel-like.
The trade-off: plumbing runs to two walls. You’ll need drain and supply lines for the tub on one wall and separate runs for the toilet and vanity on another. That means more pipe, more fittings, and more labor. If the bathroom is on a second floor, routing drains through joists can get complicated, consult your local code to confirm drain slope requirements (typically 1/4 inch per foot for waste lines).
L-shaped layouts also let you tuck the toilet into a corner or behind a half-wall, which adds privacy without a separate water closet. A 2×4 pony wall topped with frosted glass or left open as a shelf can screen the toilet from the door while keeping sightlines open.
Space-Saving Design Tips for 5×7 Bathrooms
Maximizing 35 square feet means eliminating wasted inches and choosing fixtures that do double duty. Here’s how to stretch the space without major structural changes.
Go Vertical: Install a tall linen cabinet (12–18 inches deep) instead of a wide vanity. A 24-inch vanity with a floor-to-ceiling cabinet beside it offers more storage than a 36-inch vanity alone. Use the space above the toilet for a wall-mounted cabinet or floating shelves, just keep the lowest shelf at least 24 inches above the tank for head clearance.
Recessed Storage: Between studs (typically 14.5 inches wide in a 2×4 wall or 22.5 inches in a 2×6 wall), you can recess medicine cabinets, soap niches, or toilet paper holders. This keeps items flush with the wall instead of jutting into the room. A recessed niche in the shower, set between studs at chest height, holds shampoo without eating into the stall.
Frameless Glass: Skip the shower curtain or framed enclosure. A frameless glass panel or a simple curved shower rod opens up sightlines and makes the room feel larger. If budget allows, a curbless shower with a linear drain can blur the boundary between wet and dry zones, though this requires careful floor sloping (1/4 inch per foot toward the drain) and may need a water-resistant subfloor like Schluter Kerdi-Board.
Lighting Layers: A single ceiling fixture casts shadows and flattens the space. Add a vanity light bar (3–4 bulbs at 75–100 watts equivalent LED) and a recessed can or two in the shower area. Dimmer switches let you dial down brightness for nighttime use. In small bath renovations, improved lighting often has more impact than new tile.
Light Colors, Big Tile: White or pale gray ceramic or porcelain tile reflects light and makes walls recede. Go with 12 x 24–inch or larger floor tiles to minimize grout lines, fewer lines mean less visual clutter. On walls, subway tile (3 x 6 inches) laid horizontally can stretch the space, but large-format tile (12 x 24 inches vertical) draws the eye up and makes ceilings feel higher.
Compact Fixtures: A corner sink or a wall-hung toilet with a concealed tank can shave 6–12 inches off fixture depth. Wall-hung toilets require an in-wall carrier like a Geberit system, which must be installed during framing, but they open up floor space and simplify mopping. A pedestal sink is another space-saver, though it sacrifices storage, pair it with a medicine cabinet or wall shelves.
Common Mistakes to Avoid When Planning Your 5×7 Bathroom
Even pros stumble on these tricky details. Here’s what to watch for before you swing the sledgehammer.
Ignoring Door Swing: Lay out the floor plan with the door in its open position. If the door hits the toilet, vanity, or tub, you’ll curse yourself every morning. Pocket doors or barn doors solve the problem but add cost and complexity, pocket doors need a double-stud wall and can’t be retrofitted easily into existing framing.
Skimping on Ventilation: A 5×7 bathroom needs a 50–80 CFM exhaust fan (calculate 1 CFM per square foot, or use the IRC formula: CFM = (length × width) ÷ 1.1). Undersized fans let moisture linger, which warps trim, peels paint, and grows mold. Duct the fan to the exterior, never into an attic or soffit, and use rigid metal duct instead of flex duct for better airflow. Install a timer switch or humidity-sensing switch so the fan keeps running after showers.
Overlooking Plumbing Access: If your tub has a whirlpool motor or if you’re roughing in for future repairs, leave an access panel in the adjacent room or closet. Cutting into tile later is expensive and ugly. Similarly, if the toilet is on an exterior wall, insulate behind it to prevent freezing, R-13 batt insulation works, but keep it away from the drain to avoid compression.
Choosing the Wrong Tile: Porous natural stone (travertine, marble) looks luxurious but requires sealing and can stain. Glazed porcelain or ceramic tile is low-maintenance and water-resistant. For floors, choose tile with a slip-resistant rating (COF 0.5 or higher for wet areas). Penny tile and tiny mosaics create miles of grout lines, great for traction, annoying to clean. When browsing design platforms for layout ideas, pay attention to grout joint width and tile size in real installs, not just renderings.
Forgetting to Test-Fit Fixtures: Before finalizing your layout, visit a showroom or big-box store and sit on toilets, stand in tubs, and open vanity drawers. A 24-inch vanity can feel cramped if the sink basin is too large or if drawer pulls stick out. Measure the rough-in distance for the toilet, most are 12 inches from the wall to the drain center, but older homes may have 10- or 14-inch rough-ins. Ordering the wrong toilet means relocating the drain or returning the fixture.
Underestimating Electrical Needs: Install a GFCI outlet within 36 inches of the sink, per National Electrical Code (NEC) Article 210.8. If you’re adding heated floors or a towel warmer, run a dedicated 15- or 20-amp circuit. A bathroom with a whirlpool tub may need a 20-amp GFCI breaker. Pull permits for electrical work, most jurisdictions require inspections for anything beyond replacing a switch or fixture.
Skipping the Mock-Up: Once framing is done, tape out fixture locations on the subfloor and walk through your morning routine. Swing the door. Step into the “tub.” Reach for the “toilet paper holder.” If anything feels awkward, adjust before drywall goes up. Moving a drain after the floor is tiled costs hundreds: moving tape costs nothing.