Table of Contents
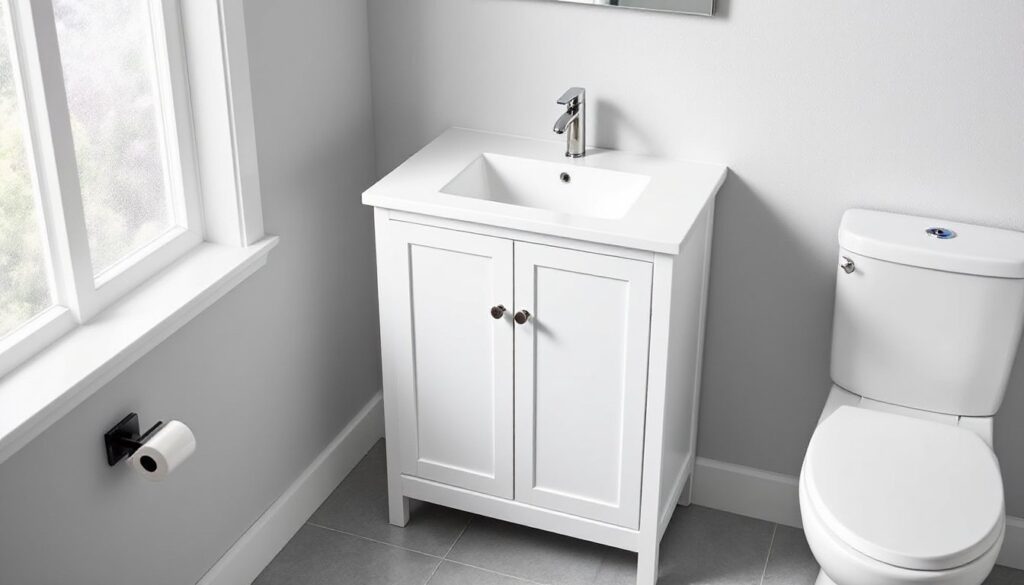
ToggleTight bathroom? A 16 inch deep bathroom vanity with sink can turn a cramped powder room or half-bath into a functional, comfortable space without the constant elbow-bumping. These shallow vanities sit closer to the wall, opening up floor space and making even the smallest bathrooms feel navigable. They’re not just for tiny homes, narrow vanities work in laundry room half-baths, basement bathrooms, or any spot where a standard 21-inch depth feels like overkill. The trick is choosing one that balances slimness with usability, so you don’t sacrifice storage or sink function for an extra six inches of walking room.
Key Takeaways
- A 16 inch deep bathroom vanity with sink opens up floor space in tight bathrooms while maintaining functionality and meeting IRC clearance requirements.
- Choose plywood or moisture-resistant MDF construction with soft-close hinges and full-extension drawer slides to ensure durability and smooth operation in humid conditions.
- Integrated or small undermount sinks work best with shallow vanities, while vessel sinks add visual height without consuming cabinet depth.
- Floating wall-mounted vanities maximize perceived space in small bathrooms, but require proper stud blocking rated for stone tops weighing 100+ pounds.
- Maximize limited storage through drawer dividers, pull-out shelves, door-mounted organizers, and vertical stacking to make your shallow vanity as functional as deeper units.
- Proper installation involves securing to studs, careful leveling, and using space-saver P-traps if the drain sits close to the wall—plumbing mistakes defeat the space-saving benefit.
Why Choose a 16 Inch Deep Bathroom Vanity?
A 16 inch bathroom vanity solves spatial problems that standard-depth units can’t. In powder rooms under stairs, narrow hallways converted to half-baths, or vintage homes with smaller footprints, a conventional vanity forces you to squeeze past or blocks door swings. Shallow vanities reclaim that space.
Beyond clearance, building codes matter. The International Residential Code (IRC) doesn’t mandate specific vanity depths, but it does require 21 inches of clear floor space in front of fixtures in most bathrooms. A shallower vanity helps you meet that requirement without shrinking the room itself. If the bathroom door swings inward, check that it clears the vanity edge by at least an inch when fully open, tight clearances cause daily frustration.
These vanities also suit accessibility needs. Wheelchair users often benefit from shallower counters that allow closer approach, though you’ll want to verify ADA guidelines if designing for full accessibility (knee clearance and height matter as much as depth).
Finally, shallow vanities cost less to ship and install. Less material means lighter weight, which can matter if you’re tackling installation solo or working with an older wall that might not support a heavy stone-top unit without blocking.
Key Features to Look for in Shallow Depth Vanities
Not all shallow vanities deliver equally. Focus on these features to avoid buyer’s regret.
Material and construction: Look for plywood or solid wood carcasses rather than particleboard. Bathrooms see humidity, and particleboard swells when the inevitable splash hits an unsealed edge. Marine-grade plywood or moisture-resistant MDF holds up better. Check that drawer boxes use dovetail or dowel joinery, not staples.
Countertop overhang: A 1-inch overhang at the front protects the cabinet face from drips. Some 16-inch vanities skimp here to save material: you’ll notice water stains within months. Cultured marble, quartz, and solid-surface tops handle moisture better than laminate.
Hardware quality: Soft-close hinges and full-extension drawer slides matter more in a small vanity, where you’re opening and closing doors multiple times a day in tight quarters. European-style concealed hinges adjust in three directions, handy if your floor isn’t perfectly level (most aren’t). Undermount slides give you access to the full drawer depth, critical when you’re working with limited storage.
Faucet drilling: Verify whether the top comes pre-drilled and for what faucet spread (4-inch centerset, 8-inch widespread, or single-hole). If you’re swapping an existing vanity, match the spread or plan to fill and re-drill holes. Some tops ship undrilled, giving flexibility but requiring a hole saw and steady hands.
Sink Options for 16 Inch Deep Vanities
Sink choice defines how usable a shallow vanity feels.
Integrated sink tops (one-piece countertop and basin) simplify installation and eliminate the sink-to-counter seam where grime collects. Cultured marble and solid-surface versions dominate this category. They max out interior cabinet space since the basin sits above the cabinet box, not inside it. Drawback: replacing a cracked basin means replacing the whole top.
Undermount sinks mount below the counter, giving a clean look and easy wipe-down. You’ll sacrifice an inch or two of depth inside the cabinet where the sink bowl intrudes. Porcelain and vitreous china undermounts are standard: just verify the bowl doesn’t project so deep it blocks drawer operation. Small rectangular undermounts (around 12 × 10 inches) fit best.
Vessel sinks sit on top of the counter. They add visual height and work well with shallow vanities because the bowl doesn’t steal cabinet space. But they require a taller faucet (usually 8 to 10 inches from counter to spout) and push the front edge of the basin closer to you, which can feel awkward if counter depth is already tight. Pair them with a wall-mounted faucet to regain counter real estate.
Drop-in sinks have a visible rim that rests on the counter. They’re the easiest DIY install (just cut the hole and set it in with a bead of silicone), but the rim catches toothpaste and soap scum. Not the best for a modern aesthetic, though they’re budget-friendly and replaceable.
Whatever sink style, confirm the drain tailpiece clears the back wall. Some shallow vanities position the drain so close to the wall that standard P-traps won’t fit without an offset or space-saver trap.
Top Styles and Designs for Compact Bathrooms
Style doesn’t disappear at 16 inches deep, plenty of designs work in this footprint.
Wall-mounted (floating) vanities bolt to studs and leave floor space visible underneath, making a small bathroom feel larger. They require solid blocking (2×6 or 2×8 horizontal nailers between studs) behind the drywall to handle the weight. Floating vanities simplify cleaning and suit modern or Scandinavian design schemes. On the downside, they expose plumbing unless you box it in or use a wall-mounted faucet.
Freestanding vanities rest on legs or a toe-kick base. They’re easier to install (no wall blocking needed) and feel more traditional. Farmhouse, transitional, and vintage styles typically use freestanding units. Some manufacturers offer 16-inch-deep versions with turned legs, which add character but reduce interior storage width.
Corner vanities fit into 90-degree angles, a smart move in awkward layouts. They’re usually triangular or L-shaped. Measure carefully, corner units often specify the wall-to-wall dimension, not front-to-back depth. They’re harder to find in 16-inch depths but do exist, especially in pedestal-style designs.
For those seeking design inspiration for small bathrooms, consider single-tone finishes (white, gray, or natural wood) that don’t visually chop up the space. High-gloss or satin finishes reflect light better than matte. If the bathroom has low light, a white or light oak vanity keeps it from feeling cave-like.
Hardware pulls and knobs matter more than you’d think. Horizontal bar pulls on drawers give you leverage without protruding far into the room. Knobs work on doors but can catch clothing if they stick out too far. Brushed nickel, matte black, and brass are current favorites and coordinate with most faucet finishes.
Installation Tips for Narrow Depth Bathroom Vanities
Installing a shallow vanity is straightforward, but a few steps prevent headaches.
Prep work: Shut off the water supply at the angle stops (the valves under the old vanity or at the wall). Open the faucet to drain residual pressure. Disconnect supply lines and the P-trap drain. If the old vanity is fastened to studs, unscrew it: if it’s just caulked, slice the caulk bead with a utility knife before pulling it away from the wall.
Check the wall behind for damage, especially if the old vanity had a backsplash. Patch any holes with joint compound and let it dry. If you’re painting, do it now, it’s easier before the new vanity is in place.
Locating studs: Use a stud finder to mark studs where the vanity will attach. 16-inch on-center spacing is standard in most walls, but don’t assume. If the vanity is wider than 16 inches (most are 18 to 30 inches wide), you’ll likely hit at least one stud. For floating vanities, install a ledger board (a 1×4 or 2×4 screwed horizontally into studs at the mounting height) to support the weight. Use 3-inch wood screws into studs, not drywall anchors, vanities with stone tops can weigh 100+ pounds.
Leveling: Set the vanity in place and check it with a 4-foot level front-to-back and side-to-side. Bathroom floors are rarely level. Shim under the base or adjust leveling feet (if the unit has them) until it’s plumb. A vanity that’s out of level will have doors that swing open or won’t close flush.
Securing: Drive screws through the vanity’s hanging rail or back panel into studs. For freestanding units, some installers skip wall attachment, but it’s safer to anchor it, especially if kids might climb or lean on it.
Plumbing connections: Attach supply lines (braided stainless is more reliable than plastic or chrome-plated copper) to the faucet tailpieces and angle stops. Hand-tighten, then give them another quarter-turn with a wrench, overtightening cracks fittings. Assemble the P-trap, making sure the trap arm slopes slightly downward toward the wall drain (about ¼ inch per foot). Shallow vanities sometimes require a space-saver P-trap or an offset flange if the drain is very close to the wall.
Turn the water back on slowly and check for leaks at every connection. Let it run for a minute, then dry all joints and look for drips.
Caulking: Run a thin bead of 100% silicone caulk (not latex/acrylic, which mildews faster) along the back edge where the vanity meets the wall and at the countertop seams if applicable. Smooth it with a wet finger or caulk tool. Don’t caulk the front toe-kick to the floor, if a supply line ever leaks, you want water to escape and alert you, not pool inside the cabinet and rot the base.
Safety note: Wear safety glasses when drilling or cutting, and use a respirator if sanding joint compound or cutting MDF (the dust is nasty). If your home was built before 1978, assume lead paint is present and follow EPA lead-safe work practices.
Maximizing Storage in a 16 Inch Deep Vanity
Shallow doesn’t mean useless. Strategic organization turns limited space into enough space.
Drawer dividers and inserts: Add adjustable or custom dividers for toiletries, makeup, and grooming tools. Narrow drawers benefit from bamboo or acrylic organizers that keep items from sliding around. Measure interior dimensions first, some drawer fronts look full-height but only offer 3 inches of interior depth.
Pull-out shelves or trays: If the vanity has a door (not drawers), install a pull-out shelf or wire basket on slides. This brings items at the back within reach without knocking over everything in front. Home centers sell kits that fit standard cabinet widths (12, 15, or 18 inches).
Door-mounted storage: The inside of cabinet doors is underused real estate. Adhesive hooks hold hair tools, and narrow racks store cleaning supplies or extra toilet paper. Keep weight reasonable, over-loading door-mounted racks strains hinges.
Vertical stacking: Use stackable bins or tiered shelves inside the cabinet to double usable height. Bathrooms accumulate short items (soap bars, razors, travel bottles) that waste vertical space when stored flat.
Over-toilet or wall shelving: If cabinet storage isn’t enough, add floating shelves or an over-toilet étagère. This keeps everyday items accessible without cramming the vanity. For more ideas on storage and layout in tight bathroom spaces, check examples of built-in niches and recessed medicine cabinets that maximize wall depth.
Medicine cabinet upgrade: Swap a basic mirror for a recessed medicine cabinet (typically 3 to 4 inches deep, set into the wall between studs). This adds hidden storage for medications, contact lenses, and small bottles without eating into room space.
Avoid storing heavy items like bulk shampoo bottles in a 16-inch vanity, weight and width quickly overwhelm the interior. Keep everyday essentials inside and relocate backup stock to a linen closet or under-sink organizer in another bathroom.
Conclusion
A 16 inch deep bathroom vanity with sink is more than a space-saver, it’s a practical fix for layouts where every inch counts. Choose durable materials, pick the right sink style for your workflow, and don’t skip proper wall blocking during install. With smart storage tactics and a clear idea of what you need daily access to, a shallow vanity can hold its own against deeper units. Measure twice, secure to studs, and you’ll have a functional, comfortable bathroom that doesn’t feel like a hallway.